Published Permissions

Showing posts with label Inkylicious. Show all posts

Monday, 26 February 2018

I spy with my little eye something beginning with "B" at Allsorts..........


Hi there my friends!

Well, last week saw me turn 46 years old (oh dear!) and my very special friend Sandra sent me this lovely new lightbulb set from Inkylicious for my birthday (thank you so much special lady).

So, seeing that the challenge theme this week at Allsorts Challenges is "I spy with my little eye something beginning with B" I thought what about my new bulb stamp!  So I coupled it with the lovely daffodils which were a release by John Lockwood with Creative Expressions so I've got two lots of bulbs - a lightbulb and daffodils!!!!

I've created a background here with distress oxides having masked off the bulb itself and then having made a mask around the bulb I added the daffodils inside the bulb.  

Acryclic paint was used for the spin art background.

The flowers are also new from Inkylicious (also sent to me from Sandra).

The grass at the bottom and the sentiment at the top are also from John lockwood with Creative Expressions and I've had those a while now.

I'd like to thank Sandra for being so generous, thoughtful and as kind as she ever is - you made my day!

Thanks for stopping by today,
Leanne xx

I'd like to enter this in to the Allsorts Challenge of I spy with my little eye something beginning with B:-


Monday, 14 August 2017

Remember the past, Live for today, Dream of tomorrow........


Hi there, well, this one's a bit striking don't you think?!!!!!  I love it!!!!!

OK, where on earth did I start with this one, oh yes, with an old dictionary page, a very old dictionary page - rather tatty and fusty!!!!

The first thing that I did was to blend some Spectrum Noir sparkle pens down the page (I've used the vintage hues set here) so I went from a rustic red, through an olive green down to a biscuit colour and dried it with a heat tool.

I then stamped Buddha in black versafine and clear embossed over the top.

Having stamped the image again on a masking sheet and cut around it, I covered Buddha with the masking piece.

I then stamped lots of falling leaves around the head and stamped the sentiment at the bottom in versafine ink.  A stencil has been used with some gesso for the white leaves that you see behind Buddha.

Removed the masking sheet from the face and darkened the edges with fired brick distress oxide ink. The edges of the page were already torn and tatty so I wasn't worried about making this worse when I darkened the edges with my blending tool - it just added to the effect!!!

Attached to a black mat.

I thought that the image popped rather well and although I wanted to "lose" a lot of the dictionary page around the main image, it has remained well on the face.

Hope you like this one, a bit different!
Thanks for stopping by,
Leanne xx

Wednesday, 26 July 2017

You can't make a rainbow without a little rain..........


Good morning!

Had a bit of fun with a new stamp that I've bought from Inkylicious called Banksy-Nola.

This was great fun to make as you all know my love for inks! The card wasn't the only thing that looked like a rainbow after this one I can tell you - you should have seen my fingers!!!!

Started off with a distress ink background and I made a few runs in that and allowed to dry naturally.

I then got the rainbow going with distress inks and added the sunshine (well, there wouldn't be a rainbow without a little rain or sunshine!).

Nola was stamped in versafine black and clear embossed.

The hills were put on with a stencil and I added the Inkylicious trees and old fence.

I then put the front hill in being careful as I wanted it to look like the rain was flowing over that hill in front of her - I think I got this result rather well, I was happy with that and added a couple of grasses at her feet.

Some Designs by Ryn raindrops were stamped around her.

Mat and layered in white and blue.


Happy with that!

Hope you've enjoyed your visit today,
Thanks for stopping by,
Leanne x


Monday, 10 July 2017

"Gone Fishing"


Good morning!

A brief post today as I'm still away on holiday but I'm keeping the blog going by scheduling ahead for you.

I have used Inkylicious stamps here.  The hills have been done using torn paper and so have the banks on either side.  

I also decided to stamp the mat behind with fish and have added some netting too!

A great make for a man - always nice to have a few of those cards in the stash isn't it!


Thanks for stopping by today,
Leanne x


Monday, 12 June 2017

For you............Sister


Good morning!

I am joining in with the fun at the Allsorts challenge today "use 2 or more dies" and the Stamping Sensations challenge of "use your favourite stamp".

Well, there was no shadow of a doubt which stamp I was going to choose as my favourite - The face from the Stampers Anonymous Classic Favourites!  I've used this face time after time and it lends itself to a huge array of backgrounds and colour schemes so here we are with another version of it!

A couple of weeks ago I also purchased the Memoirs Of A Lady stamp from Inkylicious as it is a reversal of this one from Stampers Anonymous with a collage background so here we are with both of them reflecting off of each other - perfect!

I have taken a photograph of the "ingredients" for you:


The Stampers Anonymous set, a new die set that I won in a competition recently and the Inkylicious Memoirs Of A Lady stamp.


So back to the project at hand!  Started with a distress ink background and stamped the Memoirs stamp on the right hand side, this gave me an idea of where to place that lovely large face on the left. Memoirs is stamped with Archival Watering Can (I needed it to be "quiet enough" to sit in the background and the large face is stamped with Archival black.

The flowers are from a set by Hobby Art and I masked the large face with paper and stamped the flower around the face again with Watering Can ink and then stamped the flower again twice on a further piece of card stock, coloured with distress inks and set aside for now.

I used the flower to stamp the flower on the right and then turned it around and stamped again to form a whole flower before I stamped a slightly different flower in back over the top and coloured again with distress inks.

The two bands across this piece are from the Tim Holtz Alterations Sizzix set - On the Edge that I won in a recent competition.  The bottom band is actually the waste part of it! - I coloured with distress ink and stamped the flowers on there too.  The top band I have cut twice so that both sides are deckled - coloured in the same distress inks and stamped "For You......Sister" - I thought this card would be perfect for my husbands sisters' birthday that is coming up in July.

Attached the die edges and then the cut out flowers over the top with 3D glue gel.

Mat and layered in matching colours, a nude pink and brown.

I loved making this card with my favourite stamp (I do have so many favourites really but this one just out shines all the rest!).

I hope you enjoyed your visit today,
Thanks for stopping by,
Leanne xxx

I would like to enter this in to the Allsorts Challenge - "2 or more dies":-

Stamping Sensations - "Use your favourite stamp":-


Sunday, 14 May 2017

It's Going To Be Wild at Fashionable Stamping Challenges this month!!!!!!


Good morning!

It's a new challenge over at Fashionable Stamping Challenges and this month the new theme is Sandras' choice of "Let's Go Wild!".

http://www.fashionablestampingchallenges.com/2017/05/14/challenge-123-lets-go-wild/


I chose to follow this theme with an African night sky and bring in the wild theme as the wild animals in the wild - loved it!

You will notice the fabulous gentle sparkle that is on this card, that's because it started life with Spectrum Noir Sparkle Pens.  I have blended the sparkle pens down the page blending from a blue, to a purple to an orange and then back out at the bottom with a brown.

I then popped on a horizon with some distress ink and a piece of paper and then lifted out the colour for the moon with water and a paper towel.

The animals were stamped on (all Inkylicious) and highlighted with a white pen to show a reflection of that big moon on them. The Foliage at the front is a stamp by Graphic 45 and the stencil work at the top is a Sheena Douglass stencil.


Popped this on for you, to show you the lovely sparkle that is there from the sparkle pens.


Mat and layered in black and white.

I do hope that this has given you some inspiration to have a go at our new challenge this month.  PLEASE REMEMBER THAT WE ARE A STAMPING CHALLENGE AND THAT THE MAIN FOCUS ON YOUR ARTWORK MUST BE A STAMPED IMAGE - NO DIGITAL IMAGES PLEASE.


Come on folks - "Let's go Wild"!!!!!!


Thanks for stopping by,
Leanne x


Friday, 24 March 2017

My five Christmas cards for March!


Good morning to you!

Well, here I am, right on form with my offering of my five Christmas cards for March!  

My news years resolution was to complete five Christmas cards every month through the year and so far, I'm right on track!

Again, just like any batch make, the cards are similar but not identical so I've taken photo's of all five so that you can take a closer peak:-


These have all been made using my gelli plate, I have stamped the trees straight on to the gelli plate (I think that these are Clarity Stamp) and also the snowflakes but they were stamped WITHOUT INK so that they actually picked the ink back off of the gelli plate (so that you can see white snowflakes in the background).

Now, I've done all sorts of different things with the trees! Some I've enhanced a bit with my polychromo pencils, others I have coloured in with the some Momento pear tart ink pad but all I have covered in the most gorgeous chunky glitter!  My beautiful stag (Inkylicious) has been stamped in versafine ink and a tiny bit of soft charcoal pencil applied to the ground where he is standing to ground him.  More snowflakes were stamped directly on to the finished artwork and again, directly on to the 7 x 7 card - I thought that looked quite pretty when all layered up - well, I say layered up, I've not actually layered anything!!!!! I've used a black alcohol pen and edged around the artwork so that it looks like I've used a black mat!!! - saved on the black card stock!!!

There, month three, mission complete!!!!!

Hope you liked your visit today and picked up some new techniques,

Thanks for stopping by,
Leanne xx


Monday, 20 March 2017

Learn To Dance In The Rain!


Good morning!

Here is something a bit "fresh" looking for you today!

How is this card to keep you in a positive mind set! " Life isn't about waiting for the storm to pass but learning to dance in the rain" - absolutely! There is too much in life to drag you backwards these days, I'm a very positive person and I always look to the bright side (that glass is always half full!) and when I came across this sentiment stamp in my stash I decided to use it!

Lets take our journey and see how I got there....


OK, I started with a piece of Sheena Stamping card that I'd had a previous play with using my gelli plate.  Here I have used my misti to place down my rubber stamp of some blotches where I wanted it to look like rain was falling. Have to confess, I have no idea the maker of the stamps here!


I have stamped my image of the girl here - Inkylicious - (second generation stamp so that it wasn't too bold - I wanted everything to look a bit "washed out!".  I then placed some blobs of watercolour paint at her feet and blew them outwards with a straw so that it looked like she was splashing in a puddle.  The raindrops were stamped on (Designs By Ryn) and some glossy accents have been added over the top of them. The sentiment was last which matched perfectly (again, Inkylicious). 


A couple of mats and layers and I was done! You can see the glossy accents on the raindrops a bit better here. I have swiped some ink across the page using an ink duster sprayed with water to give that impression of wet ground.

Quite a quick card to produce for me but great fun, quite "loose" work, I achieved what I wanted -  the feeling of water all around.

Hope you've enjoyed todays journey,
Thanks for stopping by,
Leanne xx


Friday, 17 March 2017

It's not what you look at that matters.............


Good morning!

Thought I'd have a go at the Cards In Envy latest challenge of "Keep it Simple" - couldn't be further from the norm for me could it?!!!!!!! - I like messy and complicated!!!!!

OK, so simple it was and of course, simple would generally be a bit of a faster make too so lets see how I got there shall we?:-


Right, here we go, I've got myself a piece of 6 x 6 Sheena Stamping Card and I've used some low tack stencil tape to mark off the area in which I want to work.  To ensure I wasn't "on the wonk" I actually measured down the sides of the card stock so that I could place the tape on perfectly.

I stamped my eye image (Inkylicious) and then just masked the eye off with masking fluid.


Just loved doing this! Then I stamped out all of the tiny peg stamps (Rubber Stamp Tapestry) with Momento dew drop ink pads - I've had these stamps for years and years and actually thought that the company wasn't still active but it is!

I then used an ink duster to add some background colour between those lines of stencil tape and stamped some of the lovely little wooden peg stamps around the eye.

Then rubbed away the masking fluid from the eye.


Stencil tape removed and colour applied to the eye and glossy accents over the top. Stamped the sentiment (also Inkylicious) and I was done!

Matted and layered on to white layers.

Perfect for a woman of any age!

I would like to enter this in to the Cards in Envy challenge - Keep it Simple:-

Thanks for stopping by today, have a great weekend,
Leanne xx


Sunday, 12 March 2017

Modes of Transport...........for Fashionable Stamping Challenges.


Good morning!

Well, here I am with my inspiration DT piece for Fashionable Stamping Challenges and our new theme for this month "Modes of Transport".

I've gone along with the theme by using an Explorer and his hot air balloon!

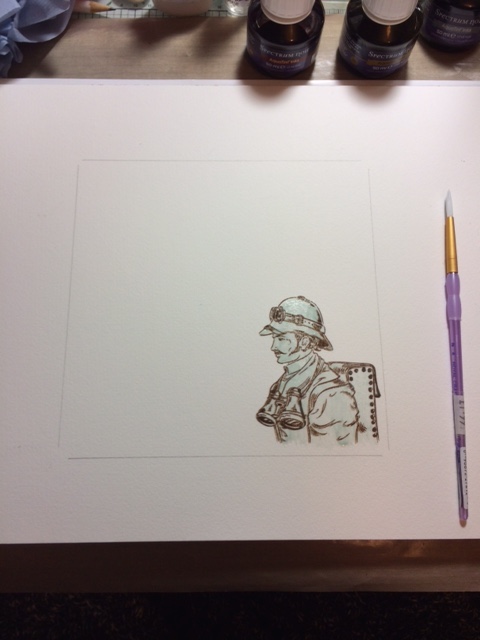
I have started here with watercolour card stock and firstly stamped my explorer ((Kanban Crafts).


I then covered him with drawing gum to mask him off.


Then out with my Aqua Tints!  I swept over the page with the colours and then went for some lovely drips from the top and stamped my hot air balloon.


Here I have added some script on there, a compass and the word explore (Clarity Stamp).


Made those drips a bit deeper in colour and added the words North, East, South and West (Kanban).  Also added the trees in the distance (I think these are Inkylicious) and made some Aqua Tints run a bit so that it looked like those trees were grounded on a hill.

Painted in the explorer at this stage too.


There!  Matted and layered on some newspaper print card stock and I was done.

Please join us over at Fashionable Stamping Challenges.

REMEMBER - the focal point of your artwork must be rubber stamping - no digi stamps.

Thanks for stopping by.
Leanne x


Friday, 24 February 2017

All good things are wild and free...........


Good morning!!!

It's been a long time since I did a farm scene on a card so here is my attempt for the Stamping Sensations challenge of "Animal Magic".

Lets take our journey and see how I built this one up and got to my final design:-


Gosh, it even shocks me sometimes how little there is on the page when you first get going!!!
So, I started by stamping my cow and the lamb and then masking them off with drawing gum. All of the animal and farmyard stamps that you will see today are by Joy! Crafts.


There, that's looking a bit more like it!  OK, the barn has been stamped right on top of the masked off cow.  The sheep has been stamped right on top of the masked off lamb.  This will enable it to look like the cow is standing in front of the barn and the lamb in front of the sheep, the lamb has very nearly disappeared altogether at the moment!  I have added a couple of milk churns, the chickens and have masked off the barn and stamped the trees behind (Inkylicious) and have built up the field scene with the use of the Joy! Crafts hay bales and a separate fence stamp.  A couple more trees have been added on that horizon line too. It's all coming together!


Doesn't it make a difference once you start adding colour?  OK, the masking fluid is still in place at this stage so that I could "swipe" Aquatints across to make the farmyard brown.  I wanted more than just a flat colour here so I also used some distress ink on an ink duster, sprayed the ink duster with water and took the brush across the page to leave me some darker patches.  The sky has been coloured using just some old blue ink that was already on my smoothie and a sky stencil that you keep moving to form the clouds and I've used momento ink and a smoothie to colour in the field.


All masking fluid has now been rubbed off and there is the little lamb!!! Everyone is looking very white so out came my polychromo pencils.


That's better!  I added some patches to make my cow more realistic (I'm not good on my cow breeds I'm afraid), gave the sheep some colour and the chickens and added some depth to the milk churns.  Completed the barn and added some birds (Inkylicious).  

There, animal magic! and as the sentiment says "all good things are wild and free"

Hope you've enjoyed our journey today and how I built up this scene from a blank page.
Here you can see the stamps that I've used.


I would like to enter this in to the Stamping Sensations challenge - "Animal Magic":-

Thanks for stopping by today,
Leanne x


Friday, 10 February 2017

Love......


Good morning!

There is a lot of steps to this card so I hope I can remember what happened and when!

Lets take our usual journey and I'll explain along the way:-


Started with a 7 x 7 Sheena Stamping card and laid down some strips of old patterned paper that I had in my stash - I applied this with decoupage glue.  When dry, I knocked it back with some Decoart Tinting Base and left it to dry (not long).


I then went over the top with two shades of Pebeo Decocreme paints and then a final touch of Decoart Tinting Base to lighten some areas.


Stamped my antique roses (free gift in this months Papercraft Inspirations magazine) in black archival ink.


Partly covered three of the roses with masking fluid - you'll see why in the next step!


Stamped a part face stamp from Inkylicious. (This is why I partly covered some of the roses just in case I caught them while stamping). Then rubbed away the masking fluid.


Woohooo! Now the fun starts!!! Here I've added some texture with some Indigoblu Super Thick Slap It On mixed with bronze Luscious Powder (gives a stunning shine), stamped some hearts, some parts of a script stamp, and faintly in the background, the same roses as the ring in Artistry Ink.


I stamped out the roses six times and over stamped with the Indigoblu script stamp and Artistry Ink - I then cut out the leaves and the flowers and painted them with VERY diluted bronze Luscious Powder.


At this point I had put on some runs of diluted bronze Luscious Powder.  I had added some hearts that had been die cut with a Sissix Bigz Die, I'd paper pieced the roses over the original roses and coloured in some of the leaves with the Luscious Powder.  Stamped the word "Love" (Clarity Stamp) on there too.  All ok so far but that face needed to pop out a bit more for me and I was looking for a face "full of love" so I decided to enhance the face, both the side that we see here and had stamped and added part of the other side of the face freehand!


There! A WHOLE FACE!!!! I have tried to have the "look of love" in those eyes.

It's a mixed media piece of artwork with plenty going on.  I had a ball making this card and the colour of my fingers was quite impressive too by the time I'd finished it!!!!

Hope you've enjoyed our journey today.

I would like to enter this in to the following challenges:-

Allsorts Challenges - "Paper Piecing":-

Try It On Tuesday - "Flowers and Hearts":-

Moving Along With The Times - "Ring O' Roses":-

The Artistic Stamper Creative Team Blog - "Love Hearts":-

Craft Stamper - "Anything Goes":-

Fussy and Fancy Challenges - "Fussy and Fancy":-

CreativeArtiste Challenge - "Anything Mixed Media Goes":-


Thanks for stopping by,
Leanne xx


Wednesday, 8 February 2017

An Oriental Thank You.....


Good morning!

A quick mid week post again this week. This is a postcard that I have made for Sunday Postcard Art's theme this week of Oriental.  Shall I let you into a secret?.......I don't have many Oriental crafting items at all!!!!!!! So this is how you "make something out of nothing"!!!!!!!

I started on a piece of 6 x 4 inch Sheena Stamping Card and blended my sky down from the top with distress inks and my ink dusters.  I then met that sky with hills inked with torn paper until they met, leaving a nice bright bit of sky just over the hills.

The trees were stamped in black Momento ink (Inkylicious) and the oriental grasses (the only oriental stamps I'd got!) were stamped across the front and falling in from above. These stamps are from Chocolate Baroque.  The small pagoda was hand drawn with black india ink (this is what we call improvising!).  

Trees and leaves were coloured using distress ink and the moon was done using Pebeo Decocreme paint.

Stamped my sentiment of thank you (Chocolate Baroque) and the birds (Inkylicious).

Edged with distress ink.

There!  How to produce an oriental scene with very few oriental tools!!!!! (Think I got away with it - don't you?!!!). I'm glad I did because I do like Sunday Postcard Art, it makes you stretch the imagination and I hope that by doing that to me, I inspire others.

Thanks for stopping by,
Leanne xx


Monday, 6 February 2017

Birds on a wire...............


Good morning!

The day I made this card, I had watched a couple of Inkylicious shows on Hochanda and so, I thought it only appropriate that I made a card with Inkylicious stamps from my stash!

I have taken photo's along the way so lets take our usual journey :-


OK, I started this card on the Inkylicious satin card stock - I must admit, I'd never used it before - it's ultra smooth and in my opinion half way between a normal stamping card and a glossy card stock which makes it perfect for stamping and ink work.

I stamped my birds and then covered them with masking fluid.  I often get contacted about how I used the masking fluid with such success - there are no secrets - use a great quality masking fluid, I use and have always used Pebeo masking fluid.  You only need a VERY THIN coating of it, it will dry in minutes and leave a very pale blue sheen where it is.  It is tinted so that you can see where it is on your artwork.  You shouldn't have any problems so long as you are using a good quality card and a very thin layer of the fluid.


So, with my birds nicely covered in masking fluid, I used distress inks to form my background colour.  This is just three colours of distress ink wiped on my craft mat, sprayed with water and the card laid on to the ink, picked up and dried off with the heat tool. I needed the colours to reflect the sky and earth tones here.


Here the masking fluid is still in place, I have stamped by swifts and swallows (again Inkylicious) in Archival watering can but I have done these with second generation stamping so that they are paler.  I stamped the tree tops (Inkylicious) underneath the birds and stamped the sentiment (Inkylicious).


I extended the wire using a micron pen, rubbed off the masking fluid (white birds now rather than blue!) and used some distress ink around the edges. I then used some black soot distress ink watered down to enhance the birds a bit.


Matted on to a simple periwinkle card stock and mounted on to a DL card.

I just loved how the gentle colours reacted with each other on here - a perfect mans card (and I don't make many of those!!!!).

Hope you liked our journey today,

Thanks for stopping by,
Leanne x