Published Permissions

Showing posts with label Designs by Ryn. Show all posts

Wednesday, 26 July 2017

You can't make a rainbow without a little rain..........


Good morning!

Had a bit of fun with a new stamp that I've bought from Inkylicious called Banksy-Nola.

This was great fun to make as you all know my love for inks! The card wasn't the only thing that looked like a rainbow after this one I can tell you - you should have seen my fingers!!!!

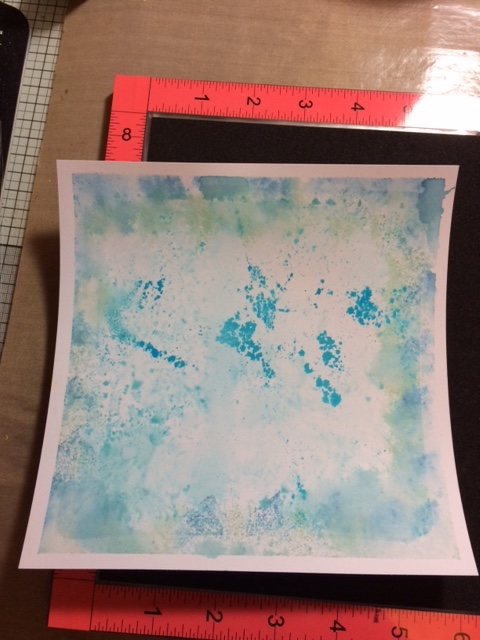
Started off with a distress ink background and I made a few runs in that and allowed to dry naturally.

I then got the rainbow going with distress inks and added the sunshine (well, there wouldn't be a rainbow without a little rain or sunshine!).

Nola was stamped in versafine black and clear embossed.

The hills were put on with a stencil and I added the Inkylicious trees and old fence.

I then put the front hill in being careful as I wanted it to look like the rain was flowing over that hill in front of her - I think I got this result rather well, I was happy with that and added a couple of grasses at her feet.

Some Designs by Ryn raindrops were stamped around her.

Mat and layered in white and blue.


Happy with that!

Hope you've enjoyed your visit today,
Thanks for stopping by,
Leanne x


Monday, 20 March 2017

Learn To Dance In The Rain!


Good morning!

Here is something a bit "fresh" looking for you today!

How is this card to keep you in a positive mind set! " Life isn't about waiting for the storm to pass but learning to dance in the rain" - absolutely! There is too much in life to drag you backwards these days, I'm a very positive person and I always look to the bright side (that glass is always half full!) and when I came across this sentiment stamp in my stash I decided to use it!

Lets take our journey and see how I got there....


OK, I started with a piece of Sheena Stamping card that I'd had a previous play with using my gelli plate.  Here I have used my misti to place down my rubber stamp of some blotches where I wanted it to look like rain was falling. Have to confess, I have no idea the maker of the stamps here!


I have stamped my image of the girl here - Inkylicious - (second generation stamp so that it wasn't too bold - I wanted everything to look a bit "washed out!".  I then placed some blobs of watercolour paint at her feet and blew them outwards with a straw so that it looked like she was splashing in a puddle.  The raindrops were stamped on (Designs By Ryn) and some glossy accents have been added over the top of them. The sentiment was last which matched perfectly (again, Inkylicious). 


A couple of mats and layers and I was done! You can see the glossy accents on the raindrops a bit better here. I have swiped some ink across the page using an ink duster sprayed with water to give that impression of wet ground.

Quite a quick card to produce for me but great fun, quite "loose" work, I achieved what I wanted -  the feeling of water all around.

Hope you've enjoyed todays journey,
Thanks for stopping by,
Leanne xx


Friday, 7 October 2016

Wicked......


Good morning!

Well, we are on the "dark side" again! Well, it is October after all - we're allowed to be!!!!

There are lots of creepy challenges out there this month and I personally love something a little "different" and having a choice to get away from cute and cuddly for a while!

I took photo's along the way so lets take a journey this morning shall we?

This card started with a piece of good quality watercolour card stock.


Now, one of my favourite mediums at the moment is drawing ink, I know lots of people shy away from it as with watercolour painting but believe me, it's really quite forgiving, just have the confidence to give it a go and the next time and the next will be better and better!  I soaked my watercolour card and dripped some yellow drawing ink on to it to make it bleed and followed that with some black india drawing ink.  When I was happy that it had spread enough I dabbed with a paper towel and lifted off the excess which lightened it to where I wanted it to be - nice and dirty looking.


Next came my stencil, this one is from Stencilgirl - isn't it fabulous! I thought she looked rather mean and ideal for a bit of a creepy card.  I went through it with black soot distress ink and then diluted some of the distress ink and painted in the right hand side of her face to give it shadow. I then stamped the drips (Designs by Ryn) on her face, neck and from the top of the image and coloured in with distress markers and topped with Glossy Accents (you can just see the tinge of blue at the top here as it wasn't dry when I took the photo).  I then stamped around the edge with some funky foam that had been embossed from a folder (another technique I've mastered recently) and stamped in spiderweb designs around her.


Here is the Sheena Douglass embossing folder that I turned in to a stamp!


I stamped the suitable sentiment "Wicked" - Chocolate Baroque.

To finish I mounted on to black card stock, framed with a gold die cut frame (Sue Wilson Pierced Squares) and mounted that on to a white 8 x 8 card which I blended the black soot distress ink all around.

I didn't want to add anything more as I felt it was complete just the way that it was.

Happy with that and if my 16 year old daughter says it's cool - then I'm happy!!

I would like to enter this in to the following creepy challenges running this month:-

Dream in Darkness - 31 days of Halloween:-

Country View Challenges - All Things Spooky:-

Dark 'n' Daring Challenges - Anything goes :-

Cards in Envy - Frame it:-

Once again, I hope I haven't frightened you off! We have to get in to the spirit don't we!!!!

Thanks for stopping by,
Leanne x