
Good morning!
Well, this one kept me busy! Lots of interest and certainly lots of colour going on here!!
This is my efforts for the Stamps and Stencils challenge theme of "Chirpy Chirpy Cheep Cheep!". I don't do "cutie" cards and I like to bring my art right in to my work so I've taken lots of photo's along the way with this one so lets take our journey and see just how I got there with this one - hold on tight it's quite a long journey today!

OK, we start with a piece of Bockingford hot pressed card stock (BRILLIANT STUFF). I've stamped the image of the hibiscus flowers and the hummingbird (both by Sheena Douglass) in Archival watering can.

Here I have just covered the stamped images with Pebeo Drawing Gum to mask them off.

A new discovery for me and a new purchase - the new Distress Oxide ink pads! - They are fantastic! They allow you to continue to layer up one colour on top of the other without creating "mud". You must allow each colour layer to dry though before applying the next layer of colour. Water must be used to obtain the best effects too.
Here I have smooshed the ink pad on to my glass mat and spritzed with water and then dabbed my card stock in to the colour, sprayed again with water from a spritzer bottle and then heat set with my heat gun. All will become clearer so don't panic!
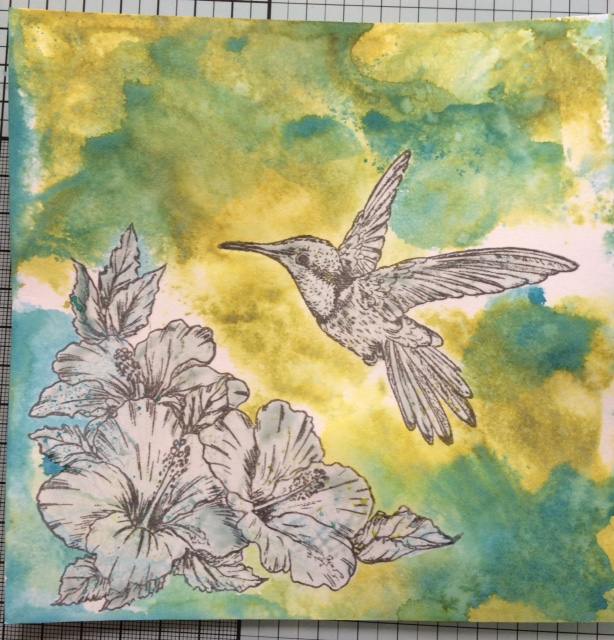
Woo hooo! Look at this coming!!!! Here comes another colour, this is peeled paint on the first layer and then I have done exactly the same as before but used broken china. Smooshed the ink pad on the glass mat, spritzed with water and then wiped the card stock in to it - instead of blending in to the peeled paint, it sits on the top of it. Spray with water and then heat set again with the heat gun.

Exactly the same done again, this time I've used fossilised amber.

OK, with the background set I then went in with some Sheena Douglass stencils and the normal peeled paint distress ink. I have also stamped the sentiment here too in black archival.

Hibiscus coloured in with spiced marmalade normal distress ink diluted and then I have used a sparkle pen to enhance the centres of the flowers. The hummingbird has also started to be coloured in using the lovely sparkle pens.

That's got it! Glossy Accents went over the hummingbird but to bring those wings to life a bit more I have walked a cocktail stick through the Glossy Accents with a couple of shades of drawing ink on it. Some Nuvo drops have also been applied to the stamens and highlights to the sentiments. Some darker leaves were also stencilled on.

Look at that bird glow!
A further two Hibiscus flowers from another set of Sheena Douglass stamps were cut out and coloured in the same way and applied to give depth.

There, told you it was a bit of a long tutorial today! Well, we got there safely and I do hope that you enjoyed the journey. Nice and bright and jolly.
I would like to enter this in to the Stamps and Stencils challenge "Chirpy, Chirpy, Cheep, Cheep":-
Hope you've enjoyed your visit today,
Thanks for stopping by,
Leanne xx


