Good morning! I hope that everyone has had a really lovely Christmas - Happy Boxing Day!
Earlier this month I had lots of fun when I went out with some friends (we actually went Christmas wreath making) and I thought of them when I fell across this stencil whilst having a bit of a craft tidy (much needed!!!) - so this piece was born!
I had a wonderful time having fun with one of my gelli plates and Stencilgirl stencils! I have taken photo's along the way so lets take our journey and see what a mess I got in to....... (I mean, see how I got there!!!!!).
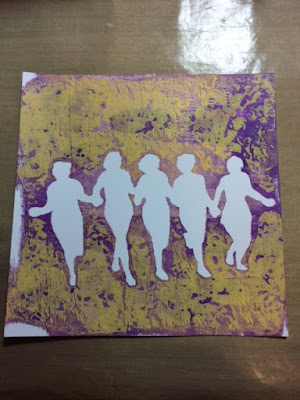
OK, first of all I laid my mask on to my gelli plate and I used acrylic paints brayered straight over the top. I then removed some of the paint with some scrunched up paper towel then removed the mask. Of course, there is no paint where the mask had covered the plate so I lifted the print and this is what I got.
This is often how I craft, I just "go with the flow" and see what I get! - Then, I work with what I've got tweaking it along the way!!!
So here I used the actual stencil part and laid it on top and ink sprayed through it so that the ladies started to take on some colour. You will notice at this point that I had laid the mask down slightly off centre so that I got a natural white edge to the right hand side. I'll show you the actual stencil and mask that I've used at the end of this post.
So here the mask has been laid down over the sprayed green area to allow me to work on that background a bit further. This will give those of you that get a bit confused with stencils and masks a chance to see the difference - the mask is the "cut out" of the aperture of the stencil (the inney) and the stencil is (the outey) bit!!! - hope I'm helping and not confusing further!!!!
Here you can see that I've sprayed some purple paint on to that background (it's still wet!).
I've swapped the mask for the stencil again now and have sponged some brown on to the ladies to enhance them a bit. An Indigoblu script stamp has been used and the sentiments have been stamped at this stage but need more work....
There!!!! mighty fine job!!! - even if I do say so myself!!!!!!!
I've worked on the sentiments with alcohol pens and a white pen and used my charcoal pencil to pop the ladies off of the page.
Mat and layered.
There, a card to create a memory - celebrate with friends! Really pleased when a plan comes together!
The Stencilgirl mask (the inney).
The Stencilgirl stencil (the outey).
Impresson Obsession sentiment and Indigoblu script stamp used.
Hope you like what you've seen and that you've found it useful if you were struggling to remember your masks from your stencils - I also hope that I've helped you to open doors to using some masks and stencils that you may have at home and were wondering what to do with them!!!!!.
I would like to enter this in to the Time Out Challenge - "Inspired by words":-
http://timeoutchallenges.blogspot.co.uk/2016/12/challenge-73-inspired-by-words.html
I would like to enter this in to the Time Out Challenge - "Inspired by words":-
http://timeoutchallenges.blogspot.co.uk/2016/12/challenge-73-inspired-by-words.html
Thanks for stopping by,
Leanne x


Fabulous Leanne. You can't beat getting all messy and I love the result, great colours too. We had a lovely Christmas Day, thank you. Hope you did too x X
ReplyDeleteFabulous card, and a marvelous technique you used. Thanks so much for playing along at Time Out. Happy New Year.
ReplyDeleteIt is always such fun working with stencils and here you took the stencil and mask to a perfect artpiece! Thank you for joining us at TIME OUT!
ReplyDelete